
Pet toys can cost anywhere from $5-10 a piece, which can quickly get expensive especially when you want to spoil your baby rotten, but with some scraps and basic skills you can have toys that look almost as good (and that your pets have just as much fun with) as those you'd get from a pet store. I know as a new pet parent, I was very tempted and even bought a lot of those expensive toys before I stumbled upon the following websites and learned from the women of Purrfect Friends the tips and tricks to designing and making my own kitten toys. Hopefully you're getting to this before you splurge or pretty early in the process! (and this way you're not spending lots of money on toys that your cat may never play with.)
The only thing that ( if you're wondering ) you should ABSOLUTELY purchase because it's hours of fun and will never get old is a laser pointer. But don't go near the eyes... that can cause blindness.
The most important rule when it comes to making your own toy (or purchasing for that matter) is ensuring that there are no small pieces that could come off and be ingested or that could cut either your pets paws, mouth or anything of that nature. You'd be surprised how much damage even a little bit of string can do to the inside of your puppy or kitten! Carefully supervise all pets with any new toys until you're sure of their safety, and even then... keep an eye on them.
Things to Avoid:
- String
- Ribbon
- Dental Floss
- Wire (this includes twist ties)
- Milk Rings- not indestructible and if chewed and swallowed you could have a trip to the vet in the near-future
- Yarn
- Hair ties
- Rubber bands
- Icicles (Christmas tree decorations)
- Paper clips
- Pens and pencils
- Aluminum foil
- Cellophane
- Plastic bags- especially shopping bags
- Shoelaces
- Marbles
- Jacks
- Anything small enough that the cat can swallow it easily
A Few Website Tutorials:
*Disclaimer: for a few of these I searched for specific toy ideas because I only had certain materials, but by searching homemade pet toys on Youtube or Google, you can find just about any tutorial if I haven't listed it below.
My Favorite Tutorial By Someone Else:
My Tutorials & Images:
1. Crocheted Jingle Fish

The jingle fish unfortunately ended up scrapped because my original tail fins were strands, but modified and crocheted tail fins would be safe.
Supplies:
1 skein of multi-colored yarn (you'll only use a 4-5 ft total, so no need to go over board!)
1 jingle bell (I used 48 mm, but any size will do. A bigger size increases the safety, but a smaller size is quicker and easier to crochet around.)
Scissors
1 crochet hook (I used a size 9, but like the jingle bell, it's up to you.)
1 spool black yarn (for attaching the tail and sewing the eyes.)
1 embroidery needle
Pattern:
1. Begin with the magic circle (http://www.youtube.com/watch?v=WLuSVyKvoUg) with six single stitches through the loop.
2. Crochet a double each stitch. Repeat for all 6 stiches.
3. Single crochet in each stitch around for 1 row.
4. Crochet one stitch, then crochet two in the next stitch. Repeat for all 12 stitches.
5. Single crochet in each stitch for 2 rows.
6. Crochet one stitch, then crochet two in the next stitch. Repeat for all 18 stitches.
7. Single crochet in each stitch for 4 rows.
8. Crochet two single stitches, then put in a double crochet. Repeat for all 18 stitches. Do 3 rows this way.
9. Stuff in Jingle Bell (or filling of your choice).
10. Crochet one single stitch, then put in a double crochet. Repeat for all 8 stitches. Do 2 rows.
11. Crochet two in each stitch. Repeat for all 4 stitches.
12. Single crochet in each stich around for 4 rows.
13. Put in double crochets in each stitch. Do 3 rows this way and tie off.
14. For the eyes and smile, sew on FIRMLY small buttons or simply use the black thread to create the design of your choice.
This pattern takes between 5-15 minutes.
2. Crocheted Rattle Eggs

You may notice some similarities between the jingle fish and the rattle eggs because this was the safer design that initially came out of them. Rather than a jingle bell, this incorporated a small plastic easter egg filled with rice.
2. Crochet a double each stitch. Repeat for all stiches. Repeat for 5 rows
3. Single crochet in each stitch around for 2 rows.
4. Crochet one stitch, then crochet two in the next stitch. Repeat for all stitches. Repeat for 4 rows.
5. Single crochet in each stitch for 5 rows.
6. Crochet one stitch, then crochet two in the next stitch. Repeat for all stitches. Repeat for 4 rows.
7. Single crochet in each stitch for 12 rows.
8. Crochet two single stitches, then put in a double crochet. Repeat for all stitches. Do 4 rows this way.
9. Fill the easter egg with the rice and super glue shut. Stuff inside the crocheted portion.
10. Crochet one single stitch, then put in a double crochet. Repeat for all stitches. Repeat as many rows it takes until you can tie off. (Optional) When tying, pull the crochet loop through until it's about 2.5 in. in diameter. Make a second loop with the tail end of the yarn to match. Double knot twice and cut the ends of the loops to create fringes.
11. Hot glue on googly eyes. (Optional)
This pattern takes between 25-35 minutes.
You may notice some similarities between the jingle fish and the rattle eggs because this was the safer design that initially came out of them. Rather than a jingle bell, this incorporated a small plastic easter egg filled with rice.
Supplies:
1 skein of multi-colored yarn
1 small plastic easter egg
1 small plastic easter egg
1/2 teaspoon of rice
Super Glue
Scissors
Super Glue
Scissors
1 crochet hook (I used a size 9, but like the jingle bell, it's up to you.)
1 hot glue gun
2 googly eyes
2 googly eyes
Pattern:
1. Begin with the magic circle (http://www.youtube.com/watch?v=WLuSVyKvoUg) with eight single stitches through the loop.2. Crochet a double each stitch. Repeat for all stiches. Repeat for 5 rows
3. Single crochet in each stitch around for 2 rows.
4. Crochet one stitch, then crochet two in the next stitch. Repeat for all stitches. Repeat for 4 rows.
5. Single crochet in each stitch for 5 rows.
6. Crochet one stitch, then crochet two in the next stitch. Repeat for all stitches. Repeat for 4 rows.
7. Single crochet in each stitch for 12 rows.
8. Crochet two single stitches, then put in a double crochet. Repeat for all stitches. Do 4 rows this way.
9. Fill the easter egg with the rice and super glue shut. Stuff inside the crocheted portion.
10. Crochet one single stitch, then put in a double crochet. Repeat for all stitches. Repeat as many rows it takes until you can tie off. (Optional) When tying, pull the crochet loop through until it's about 2.5 in. in diameter. Make a second loop with the tail end of the yarn to match. Double knot twice and cut the ends of the loops to create fringes.
11. Hot glue on googly eyes. (Optional)
This pattern takes between 25-35 minutes.
3. Braided Jingle Ropes

For hanging from a door handle. Provides hours of fun for kitties.
Supplies:
3 strands of multi-colored or of different colored yarn cut into 3 yard pieces
6 jingle bells (48 mm)
Scissors
Ruler
Pattern:
1. Match up the ends of all 3 strands of yarn, and fold in half.
2. At the looped end, tie a knot leaving a loop large enough to fit over a door handle (it's about the size of a clenched fist or 6-7 in.).
3. Divide the strands into three groupings of two strands and begin a basic braid pattern.
4. Stop after you have braided 6-7 in. and in the grouping of two strands on the far right of your pattern, take the outside strand and run it through the top loop of the jingle bell until it is flush with your braided portion.
5. Continue braiding for another 6-7 in. and repeat on the opposite side so that the jingle bells alternate.
6. Repeat steps 4 and 5 twice more and then braid until you have about 6 inches left at the bottom. Tie off your braid and place over the door handle of your choosing.
This pattern takes about 15 minutes to complete one braid.
4. Sewn Cat Carrier Inserts

5. Turn the square inside out and stuff if you would like.
6. Finish off the 1/4 of the fourth side that hadn't been sewn yet and tie off. Cut excess thread.
This pattern takes between 10-20 minutes.
Supplies:
Ruler
Scissors
1 Needle or Sewing Machine
3 spools white thread
2 squares 21x21in.
1 bag of polyester filling (optional)
Pattern:
This tutorial is useful if you aren't familiar with sewing fabric together. You should be sewing 1/2 in. from the edges of the fabric to reach the final 20x20 in. size.
1. Put the two squares together and sew around three sides and 3/4 of the remaining side.5. Turn the square inside out and stuff if you would like.
6. Finish off the 1/4 of the fourth side that hadn't been sewn yet and tie off. Cut excess thread.
This pattern takes between 10-20 minutes.
5. Sewn Pet Rugs/Beds
![]()
2. Sew two of the 5x5in strips onto opposite sides of one of the remaining 5x20in. strips. Repeat for the other.
3. Sew the three strips that you have created together creating a 30x30 in. square. Ensure that the portions that were sewn together are all facing the same way.
4. Put the colored square and the cream square together and sew around three sides and 3/4 of the remaining side.
5. Turn the square inside out and stuff if you would like.
6. Finish off the 1/4 of the fourth side that hadn't been sewn yet and tie off. Cut excess thread.
This pattern takes between 20-30 minutes.

The image above is of the pet rugs for the Petco cages before finishing. The pet rugs are 27x27 in. and this pattern is for the patchwork design as shown above, but this could easily be completed out of fabric cut into 30x30 in. squares and sewn.
Supplies:
Ruler
Scissors
1 Needle or Sewing Machine
3 spools white thread
1 square 20x20 in. colored fleece
4 strips 5x20 in. colored fleece
4 corners 5x5 in. colored fleece
1 30x30in square of cream fleece
1 bag of polyester filling (optional)
Pattern:
This tutorial is useful if you aren't familiar with sewing fabric together. You should be sewing 1/2 inch from the edges of your fabric to reach the 27x27in. final size.
1. Sew two of the 5x20 in. strips onto opposite sides of the 20x20 in. square 2. Sew two of the 5x5in strips onto opposite sides of one of the remaining 5x20in. strips. Repeat for the other.
3. Sew the three strips that you have created together creating a 30x30 in. square. Ensure that the portions that were sewn together are all facing the same way.
4. Put the colored square and the cream square together and sew around three sides and 3/4 of the remaining side.
5. Turn the square inside out and stuff if you would like.
6. Finish off the 1/4 of the fourth side that hadn't been sewn yet and tie off. Cut excess thread.
This pattern takes between 20-30 minutes.
6. Sewn Catnip Toys
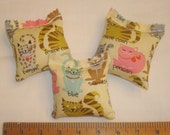
These little catnip pouches are great to make in bulk and keep in ziplock baggies for a little bit of impromptu fun for your kittens. Don't be concerned if your young ones don't show any love for catnip though, there usually isn't a response to the herb until at least 6 months of age.
Supplies:
2 pieces of fabric of your choice 4.5 in x 4.5 in.
Scissors
Sewing needle/Machine
1 spool of white thread
Ruler
1-2 tablespoons of good catnip (I prefer Cosmic Catnip)
Pattern:
1. Place the two pieces of fabric together with the pattern facing inwards.
2. Use the sewing machine or your needle to sew along three sides of the square, 1/2 in. from the edges of the fabric.
3. Turn the square inside out, stuff with catnip and then sew along the remaining side 1/2 in. from the edges of the fabric. Tie off and cut excess thread.
7. Multi-Color Cat Springs
The toys don't look like much, but you'll be surprised when you see your kitty's face light up as he bats these colorful springs around the house.
Supplies:
2 large pipe cleaners
Something about the circumference of a nickel or quarter to wrap around
Pattern:
1. Take the two pipe cleaners and wrap them around each other so that it's a swirl of two colors.
2. Make sure that the sharp ends are bent in and twisted so that there's nothing your cat or kitten could potentially get caught on or cut themselves with.
3. Twist the pipe cleaner swirl around your stick or thumb to create a spring.
4. Stretch the spring a little to give it some nice bounce.
This pattern takes about 3-5 minutes.
Nice article and tips thanks for sharing. Am also running website, Dogs health have a visit and get more tips and suggestions.
ReplyDelete